
Sanding and Sealing Hardwood Floors – Top 10 Expert Tips
Sanding and Sealing Hardwood Floors: The Complete 2025 Guide
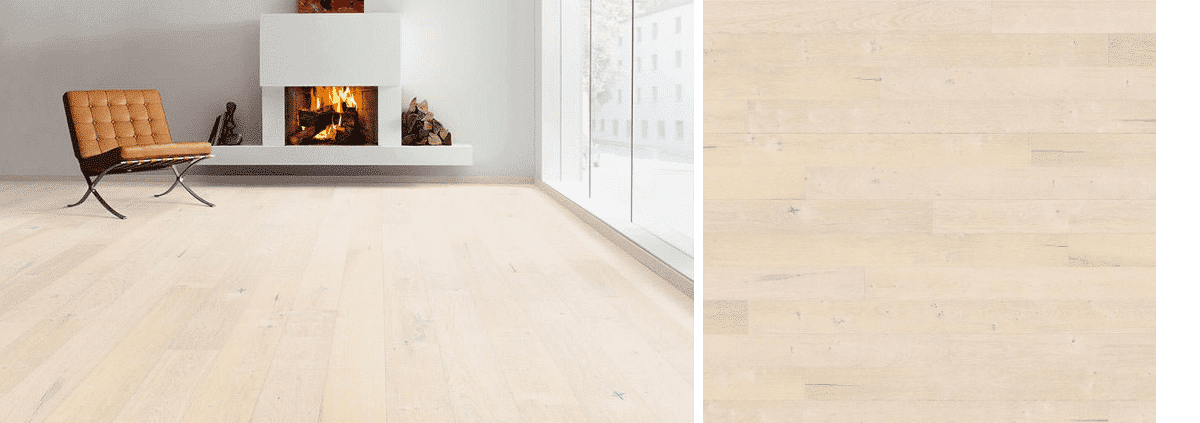
Transforming tired wooden floors into beautiful, durable surfaces starts with professional sanding and sealing hardwood floors. At Nationwide Hardwood Flooring Company (Tel: 07940 528 315, Email: enquiries@nhfcompany.co.uk), we help homeowners and businesses across the UK achieve flawless hardwood finishes that last for decades. Whether you own a Georgian terrace in London or a modern apartment in Manchester, well-maintained hardwood flooring enhances your property’s aesthetic, value, and comfort. For expert insights, explore the National Wood Flooring Association for authoritative industry standards.
Understanding the Sanding Process
The first step in sanding and sealing hardwood floors is surface preparation. Over time, hardwood surfaces develop scratches, stains, and uneven textures. Sanding removes these imperfections by gently grinding off the top layer of the wood, revealing a fresh, smooth surface ready for sealing. This process restores the floor’s original beauty while ensuring an even base for layers of sealant to bond properly. To explore our professional approach, visit our project portfolio or see the National Association of Independent Contractors’ guide on sanding techniques for more information.
Professional Sanding Machines and Techniques
At Nationwide Hardwood Flooring Company, we use industrial-grade sanding equipment to ensure uniform results across every plank. Our process typically includes three key stages:
- Rough Sanding: Removes old finishes, paint, and surface damage using coarse-grit abrasives.
- Medium Sanding: Refines the texture and eliminates shallow marks with a medium-grit pass.
- Fine Sanding: Polishes the surface for a smooth base before sealing.
For a deeper understanding of proper sanding sequences, review the overview of floor sanding techniques endorsed by experts.
Why Professional Sanding Matters
DIY enthusiasts often underestimate how demanding sanding and sealing hardwood floors can be. Quality sanding requires precision to avoid uneven finishes. Our experts maintain consistent pressure and control during every stage. Learn more about best practices from the Diamond Certified guide on hardwood sanding methods or discover our results in our floor care blog.
Types of Sealants for Hardwood Floors
Once sanding is complete, sealing protects the raw wood from moisture, wear, and discoloration. Choosing the right sealant depends on factors such as wood species, expected foot traffic, and desired finish. Our team aligns finishes to flooring ranges like Buckingham Solid Oak Flooring for authentic charm or Balmoral Engineered Flooring for modern strength. The NWFA finishes guide offers an in-depth look at available finish types and their benefits.
Popular Sealant Options
- Water-Based Polyurethane: Fast-drying and eco-friendly, ideal for urban flats. Consider reading the CoatingsTech analysis on low-VOC finishes for more on sustainability.
- Oil-Based Polyurethane: Perfect for classic homes seeking deep gloss and richness.
- Hardwax Oil: Enhances natural textures with a protective, breathable layer.
- Acid-Cured Finish: Extremely durable for high-traffic spaces like commercial settings.
Benefits of Sanding and Sealing Hardwood Floors
Investing in sanding and sealing hardwood floors extends the floor’s lifespan and maintains hygiene and elegance. It’s a cost-effective renovation choice that revives interiors without full replacement. For detailed homeowner resources, consult the Homeowner’s Handbook to Real Wood Floors.
Step-by-Step Professional Sanding and Sealing Process
Here’s what you can expect in a full professional restoration:
- Assessment: Inspect floorboards for damage or loose fittings.
- Preparation: Remove furniture and repair gaps.
- Dust-free Sanding: Apply vacuum extraction technology for cleanliness.
- Sealing: Apply selected finishes from trusted product lines.
Refer to the Maple Flooring Manufacturers Association protocol for optimal sanding and sealing intervals.
Maintenance After Sealing
Allow adequate curing time and maintain with neutral cleaners. The National Wood Flooring Association maintenance guide provides reliable aftercare advice.
Common Mistakes in Sanding and Sealing
Errors often occur when skipping grit stages or applying sealant before thorough cleaning. Review NWFA’s technical guidelines for professional floor finishing best practices.
Understanding the Cost of Sanding and Sealing
Costs range based on wood type, area size, and chosen finish, averaging £15–£30/m². For accurate budget planning, reference Consumer Reports’ wood finish reviews to compare product value and durability.
Aftercare and Longevity Tips
Maintain your floors using pH-neutral products and seasonal upkeep. NWFA’s maintenance recommendations outline cleaning schedules, humidity control, and refinishing intervals to ensure your flooring’s long-term beauty.
Choosing Nationwide Hardwood Flooring Company
Nationwide Hardwood Flooring Company provides sustainable materials and expert craftsmanship for long-lasting hardwood finishes. Learn more on our About page or contact us directly via our contact form to discuss your next project.


