
Best Way to Sand Wood Floors: 5 Pro Tips
Why Proper Sanding Matters in London Homes
London’s historic architecture means many properties feature original wooden floorboards dating back to the Victorian, Edwardian, or Georgian eras. These homes, especially in areas like Islington, Notting Hill, and Greenwich, often boast solid wood flooring that has endured decades of foot traffic, pet scratches, and furniture marks. Our approach prioritizes preservation while delivering a durable, long-lasting finish. See our project gallery to learn more: Our Work.
Improper sanding can cause irreversible damage. Overly aggressive passes or skipping grit sequences can leave deep gouges or uneven surfaces. Understanding the best way to sand wood floors isn’t just about aesthetics—it’s about preservation. Our case studies demonstrate how we handle complex patterns like herringbone: Our Work.
London’s climate—with fluctuating humidity and seasonal damp—can cause wood to cup or warp. A proper sanding and finishing plan, paired with moisture management, is essential. Visit our shop pages for product recommendations, such as Loch Tummel and Loch Achray.
Tools and Equipment: What You’ll Need
The best results start with the right tools. While DIY rentals are tempting, professional-grade equipment and expertise yield superior outcomes. Typical selections include:
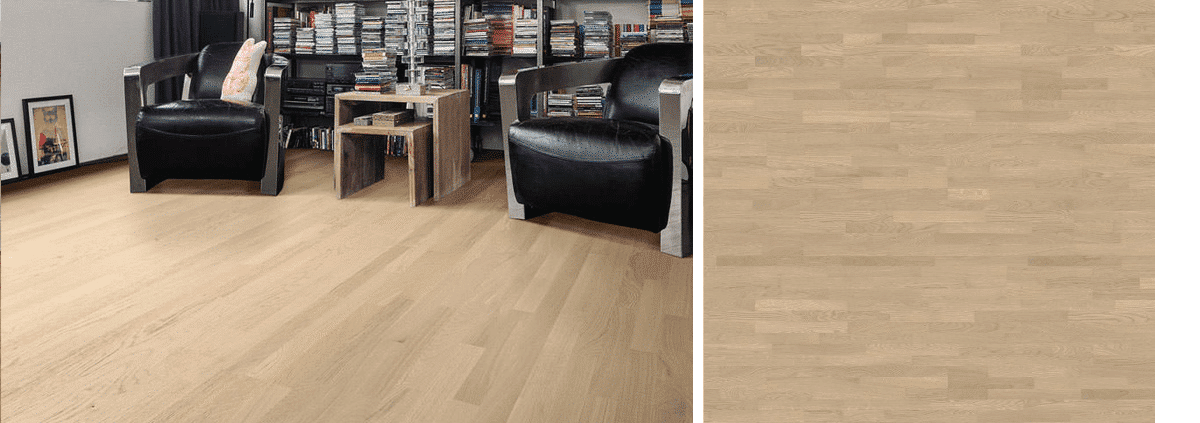
- Drum Sander – Ideal for large, open areas. If you’re exploring options, consider our selection, including Benton multi-ply flooring.
- Orbital or Random Orbital Sander – For fine finishing and smaller areas. Less aggressive, reducing swirl marks.
- Edge Sander – Reaches corners and edges where larger machines can’t go.
- Dust Containment System – Essential in flats and multi-unit buildings to protect HVAC systems and neighbors.
- Moisture Meter – Ensures optimal moisture content before and after sanding.
- Vacuum with HEPA Filter – Reduces airborne dust during and after work.
- Sanding Belts and Pads – Available in grits from 36 to 120 for progressive smoothing.
At Nationwide Hardwood Flooring Company, we use Lägler- and Bona-certified equipment to ensure precision and minimal dust, which is particularly important in listed buildings and conservation areas. Explore compatible products in our range, such as The Primes engineered flooring.
Step-by-Step: The Best Way to Sand Wood Floors
Follow this proven 5-step process—the best way to sand wood floors—to achieve a flawless, professional-grade finish.
Step 1: Inspect and Prepare the Floor
Begin with a thorough inspection. Look for:
- Loose or damaged floorboards
- Nails or staples protruding
- Existing finish type (oil, polyurethane, wax)
- Signs of water damage or rot
In older London properties, uneven boards or mixed wood species are common. Replace severely damaged timber and countersink raised fasteners. For broader guidance on repair materials, see our product pages like Loch Sheil.
Clear the room, remove furniture and rugs, and seal doorways to contain dust—especially in flats above shops in areas like Shoreditch or Brixton.
Step 2: Start with Coarse Grit Sanding
Begin with a coarse-grit belt (36–40 grit) on the drum sander to remove the old finish and deep scratches. Sand with the grain to avoid cross-grain scratches and overlap passes by about 50% for even coverage. For parquet patterns, consult our project notes on Our Work.
Engineered hardwood requires caution not to sand through the wear layer. Our teams use precision depth gauges to monitor removal, especially on herringbone engineered flooring in luxury flats.
Step 3: Progress Through Medium and Fine Grits
After the initial pass, switch to medium grits (60–80) to smooth scratches, then finish with fine grits (100–120) using an orbital sander for a glass-like surface. This progressive approach prevents visible marks under finish. Use the edge sander around perimeters to avoid dishing.
Step 4: Clean Thoroughly and Inspect
Vacuum the floor with a HEPA-filter vacuum, then wipe with a microfiber cloth lightly dampened with mineral spirits to remove fine dust. Inspect under bright light and address any uneven areas with spot sanding. Consider sealing options from our range, like Chalfield.
In London, many homes have underfloor heating, so ensure the floor is completely clean and dry before finishing to prevent adhesion issues and premature wear.
Step 5: Apply Finish
Common finish options include:
- Water-Based Polyurethane – Dries quickly, low odor, ideal for flats and homes with children or pets.
- Oil-Based Polyurethane – More durable and amber-toned, best for high-traffic areas.
- Hardwax Oil – Enhances natural grain and is easy to repair, popular in Scandinavian-inspired London homes.
Apply with a lambswool applicator or microfiber roller, following the grain. Allow proper drying time between coats (typically 4–8 hours) and lightly sand between coats with 120–150 grit for adhesion. Most professionals apply 2–3 coats for residences and 3–4 for commercial spaces. For product compatibility, see our finishing options like Balmoral.
Common Mistakes to Avoid
Avoid these errors that commonly compromise results:
- Sanding Against the Grain – Causes visible scratches.
- Incorrect Grit Sequence – Jumping from 36 to 100 leaves deep marks.
- Over-Sanding Edges – Edge sanders can create hollows if not handled carefully.
- Ignoring Moisture Levels – Wood above 12% moisture can cup after refinishing.
- Poor Dust Control – Can affect equipment and neighboring units in flats.
Our dust-extraction systems capture over 98% of particulates, making us a preferred choice for apartment projects in Zone 1. For maintenance, see our durability-focused guidance and dust-control best practices in our blog.
When to Call a Professional Floor Contractor
While DIY sanding is possible, the best results often come from a certified flooring contractor. Consider professional help if:
- There are deep gouges, water damage, or uneven boards
- The floor is engineered or parquet with intricate patterns
- Historic homes in conservation areas
- Large commercial spaces or projects requiring minimal downtime
Nationwide Hardwood Flooring Company offers full-service refinishing with minimal disruption. We are insured and certified in Bona and Loba finishing systems. For more about our services, visit Wooden Floor Installation.
London-Specific Considerations
London’s diverse housing stock presents unique challenges. Key subsections include:
Victorian and Edwardian Floorboards
Common in areas like Camden, Islington, and Peckham, these floors often require adhesive removal, patching, or leveling before sanding. Our product lines, including Loch Tay and Loch Rannoch, support restoration projects of this nature.
For preserved floors, a screen-and-recoat approach can preserve thickness while delivering a refreshed surface.
Herringbone and Parquet Flooring
In luxury flats, herringbone engineered floors or solid parquet require specialized sanding. We use a combination of hand-scraping, orbital sanding, and low-profile edgers to protect patterns. Suitable products include Alnwick and Chatsworth.
For herringbone oak, oil-based finishes enhance grain contrast and provide durable protection in high-end properties.
Basement and Ground Floor Challenges
Moisture-prone areas like Wapping or Deptford require moisture testing. If subfloor humidity is high, consider a moisture barrier or delay the project.
We’ve restored floors in basement flats in Camden Town by combining dehumidification, moisture testing, and vapor-resistant finishes.
Cost of Sanding Wood Floors in London
Costs vary by size, condition, and finish. Typical ranges are:
- £15–£25 per m² for basic sanding and sealing
- £25–£40 per m² for full restoration with repairs and premium finishes
- £40+ per m² for intricate parquet or herringbone engineered flooring
DIY rental costs around £100–£150 per day, but hidden expenses often erase savings. For a quick consult, contact us via our Contact Us page. We provide transparent, no-obligation quotes. Call 07940 528 315 or email enquiries@nhfcompany.co.uk for a free assessment.
Maintenance Tips After Sanding
Post-sanding care extends finish life. Consider these tips:
- Wait 24–72 hours before walking on the floor, depending on finish type
- Use felt pads under furniture legs
- Sweep daily with a microfiber mop
- Use pH-neutral cleaners; avoid vinegar or steam mops
- Re-coat every 3–5 years to maintain protection
For high-traffic areas, area rugs can reduce wear. In bathrooms, ensure proper sealing and ventilation to prevent moisture damage. See our maintenance guides for Balmoral and Loch Morar finishes for long-term care.
Why Choose Nationwide Hardwood Flooring Company?
As a trusted London flooring partner, we emphasize quality, reliability, and craftsmanship. Our differentiators include:
- Local Expertise – We understand London’s building styles across districts from Hampstead to Shoreditch.
- Advanced Equipment – Dust-free sanding systems and precision tools for flawless results.
- Wide Range of Services – From supply to luxury installations. Explore options such as Barn and Loch Morar.
- Transparent Pricing – Upfront quotes with no hidden fees.
- Eco-Friendly Options – Low-VOC finishes and sustainable sourcing for real wood flooring.
Whether you’re refinishing engineered timber in a Dalston loft or installing solid oak in a Hampstead family home, we deliver exceptional results on time and within budget.
Conclusion: Mastering the Best Way to Sand Wood Floors
Sanding wood floors combines the right tools, technique, and attention to detail—especially in London’s diverse and historic context. From a herringbone engineered floor in Knightsbridge to solid oak in Peckham, proper sanding restores beauty, improves air quality, and increases property value.
While DIY can be tempting, the risk of damage and uneven results is high. For guaranteed, professional results, trust a certified flooring contractor with local experience.
Nationwide Hardwood Flooring Company is committed to delivering the best way to sand wood floors—with precision, care, and respect for your home. Contact us today at 07940 528 315 or enquiries@nhfcompany.co.uk to schedule your free consultation.
Let us help you uncover the hidden beauty beneath years of wear and restore your wooden floors to their original glory.


