
Sanding Down Old Hardwood Floors: Ultimate Guide 2023
Sanding Down Old Hardwood Floors: An Essential Guide
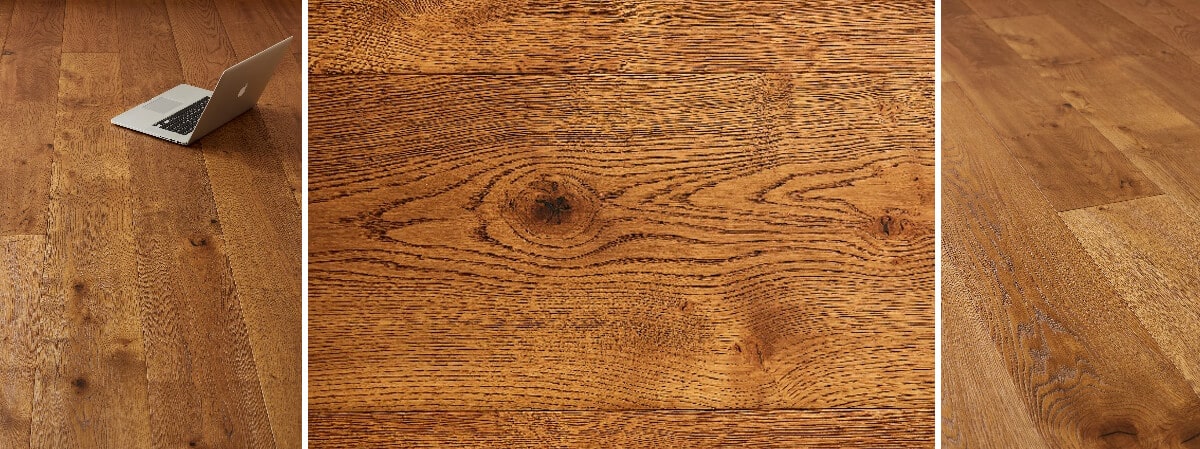
Hardwood floors are a timeless addition to any home, offering natural beauty and warmth. However, over time, even the most resilient floors can lose their luster. If your floors have seen better days, sanding down old hardwood floors can restore their beauty, breathing new life into your space. This comprehensive guide will help you understand the process, costs, and benefits associated with sanding your hardwood floors.
The Advantages of Sanding Old Hardwood Floors
Sanding your old hardwood floors removes imperfections and old finish, revealing fresh wood underneath. The benefits include smooth surfaces, improved aesthetics, and enhanced longevity. Furthermore, sanding prepares the surface for a new finish, protecting against wear. For examples of exquisite floor restorations, visit our portfolio of completed projects. For more information on maintaining hardwood flooring, see this guide on hardwood floor maintenance by Bob Vila.
Why Sanding is Necessary
Sanding not only restores the aesthetic appeal of your floors but also removes scratches, stains, and uneven surfaces. It’s an indispensable part of floor maintenance, especially in high-traffic areas like living rooms and hallways. If you’re considering new installations or designs, you might explore our Herringbone Chalfield Multi-ply flooring for inspiration. To understand more about why floor sanding is important, refer to this informative article on how to sand wood floors by HGTV.
Preparing for the Project
Preparation is key. Clear your room of furniture and clean the floors thoroughly. Assess the floor condition to determine the sanding method—whether heavy-duty sanding for deeply scratched floors or a lighter touch for preserving the wood. Learn more about preparation and installation with our installation guides. For a comprehensive guide on preparation, visit This Old House.
Gathering the Right Tools
- Drum Sander
- Edge Sander
- Sandpaper (Various Grits: 60, 80, 120)
- Vacuum Cleaner
- Safety Equipment (Goggles, Dust Mask)
The Sanding Process
Step 1: Initial Sanding Start with a coarse grit sandpaper (60) to remove the old finish and smooth out large imperfections. Move the drum sander methodically across the floor.
Step 2: Edge Sanding Use an edge sander for corners and hard-to-reach areas. Make sure to overlap slightly with areas sanded by the drum sander.
Step 3: Medium Sanding Switch to a medium grit sandpaper (80) to refine the floor’s surface, preparing it for the final sanding.
Step 4: Final Sanding Finish with a fine grit sandpaper (120) for a smooth, ready-to-finish surface.
Clean and Inspect
Vacuum the floor thoroughly, removing all dust and debris. Inspect the surface, ensuring it’s smooth and blemish-free. Spot sand any remaining imperfections. Learn more about keeping your sanded floors clean with these tips from Clean My Space.
Finishing Touches
Once sanded, your floor is ready for staining or sealing. Choose from a variety of finishes, from glossy to matte, depending on your preference and the room’s aesthetic. Consider our Loch Tummel Multi-ply flooring for a distinctive look. For guidance on floor finishing, explore this article on how to finish a wood floor by Family Handyman.
Understanding Cost Implications
The cost of sanding down old hardwood floors varies based on floor size, condition, and the choice of finish. On average, expect to invest between £3 to £6 per square foot. Hiring professional floor fitters might increase costs but guarantees quality and time-saving results. For a detailed breakdown of costs, see Remodeling Calculator.
DIY vs. Professional Sanding
While DIY projects can save money, they require time, skill, and effort. Professional services ensure high-quality results with less hassle. For a guide on professional services, visit our about page to learn more about our expertise. For a comparison of DIY versus professional sanding, check out HouseLogic.
Conclusion
Sanding down old hardwood floors revitalizes your home, enhancing both appearance and value. Whether you tackle it yourself or enlist professionals from Nationwide Hardwood Flooring Company, remember that the effort you put in now secures the durability and beauty of your floors for years to come. For expert advice or to schedule a service, contact us at 07940 528 315 or enquiries@nhfcompany.co.uk.


